Employees


Employees |
|
|
This function allows you to maintain information about your Employees.
Tip: Employee data can be automatically loaded into Encompassing Visions using the Import Data function.
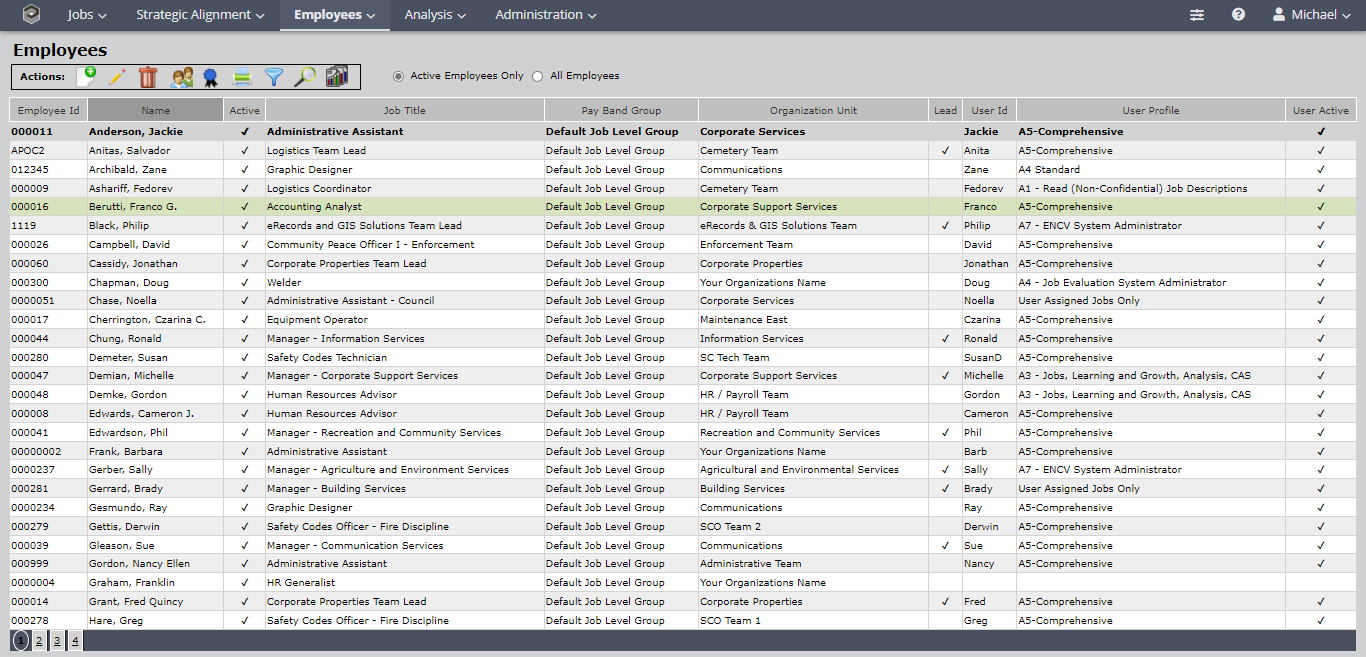
From the Main Menu move the mouse over Employees and click Employees, opening the Employees list:
•The Employees screen shows the following information for each employee: Employee ID, Employee Name, Active status, Job Title, Job Level Group (Policy Enabled), Organization Unit, Lead status, User ID, User Profile and User Active status. •The selected Employee is displayed at the top of the screen and is highlighted within the table.The Employee Name column includes all Employees,defaulted to sort by Last Name. To sort by any column (in ascending or descending order), simply click the column title. The sort selection will be shaded. Use the Quick Search box to find a specific Employee. ▪Number of Employees retrieved on pages depends on screen resolution. ▪Instant screen population of Employees information independent of data size (from 100 employees -100,000 employees). ▪Page numbers located at bottom of screen •Double click on any Employee to view the details screen.
The Actions Menu will allow you to maintain Employee information. Lists all of the additional functions that can be performed from within the Employees module. The selections are enabled and disabled based on the access rights assigned to the user for the Employees function and the status of the Employee. Not all access levels can select all functions.
The Actions available on this screen are: •Add an Employee. •Edit the Employee that is highlighted. •Delete the Employee that is highlighted. •Add/Edit Reviewers, •Add/Edit the Skills/Certifications, •Print the Employees Listing. •Filter the Employee list. •Search by Employee Name or ID •Generate Employee Related Reports
•Click
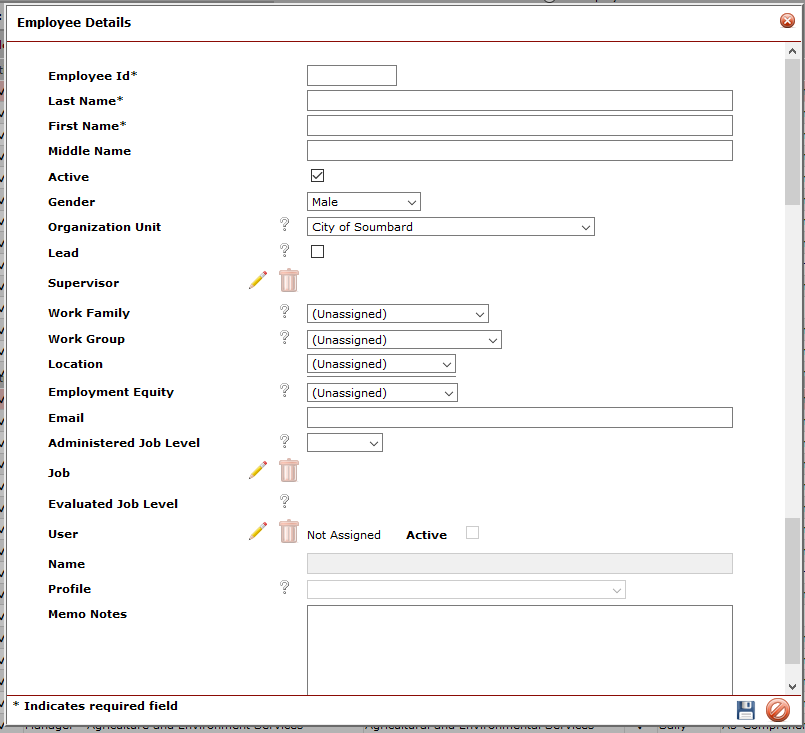
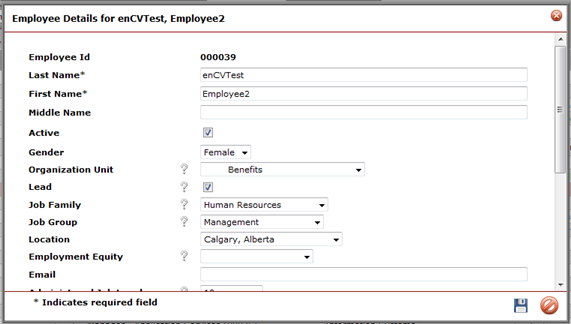
•Enter the Employee ID. Employee ID is the Primary Key for the Employee table and must be unique. Tip: It is recommended that the Employee ID in Encompassing Visions be the same Employee ID that is used in your payroll system or HRIS. •Enter the Employee name information. •Check the Active box. •The Gender defaults to Male. •The Organization Unit defaults to the highest level of the organization structure. Select the specific organization unit the employee works within. •Important: Be sure to check the Lead box for all Employees who are the Lead of the organization structure they are attached to. •Attach the Supervisor to the Employee. New for version 9.4, this link will enable your organization to identify the Supervisor/Employee relationship for Reviews (Policy Enabled), reporting and other tasks. See the Default Reviewers for more information. •Job Family, Work Unit, Job Group and Employment Equity are optional, but should be populated if those elements have been configured for your organization. The Job Group is particularly important as a number of system configurations and reports are linked to and enabled by this data field. •Enter Employee E-mail. •Administered Job Level is optional, however, the Succession Planning module does look to this field in the job level filter, so we recommend that you populate it for all employees. •Attach a Job to the Employee. •Attach the User ID to the Employee. •Add any Memo Notes. •
Note: if the Evaluated Job Level is not the same as the Administered Job Level, the Administered Job Level field should be populated.
Note: Required fields must be saved prior to selecting a job.
To attach a Supervisor to an Employee In the Employee Details screen: 1.Click 2.To search by Supervisor name, begin to enter their last or first name. The system will populate all possible choices. 3.Select the appropriate Supervisor.
To attach a Job to an Employee In the Employee Details screen: 1.Click 2.To search by Job Reference or Job Title, begin to enter the reference number or job. The system will populate all possible choices. 3.Select the appropriate Job. 4.The selected Job will populate in the Employee Details. 5.Evaluated Job Level of the selected Job will now also be displayed.
Administrator Note: If the Job title does not display within the search box, and the job approval policy is turned on, the said job will not display due to the job being unapproved.
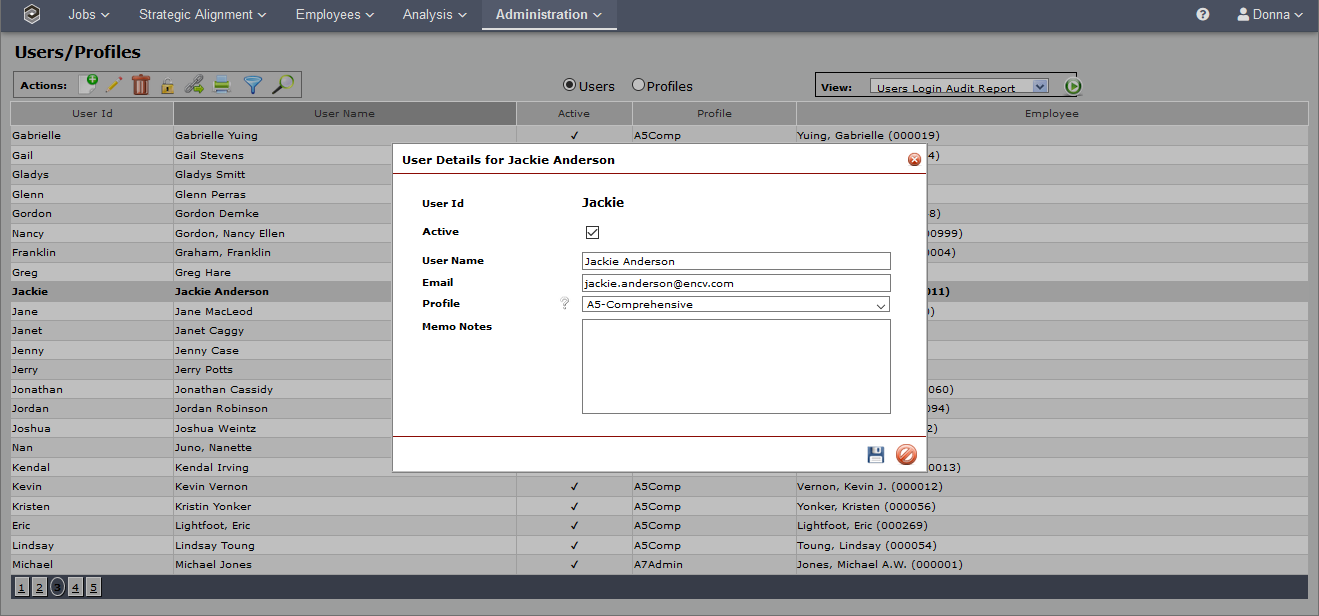
In the Employee Details screen: 1.Click 2.To search by User Name or User Id, begin to enter the User's name or the Id. The system will populate all possible choices. 3.Select the appropriate User name. 4.If a User's name is not available. Click the 5.Enter in all information and
Click
Notes: •A User ID can only be attached to one Employee at a time. •If a User ID is already attached to another Employee, the User Name/User Id will not populate in the search box field (no match).
When entering/updating the email address for an employee in the Employee Details module, that email address is automatically populated into the User Module to save administrative time and minimize data entry error.
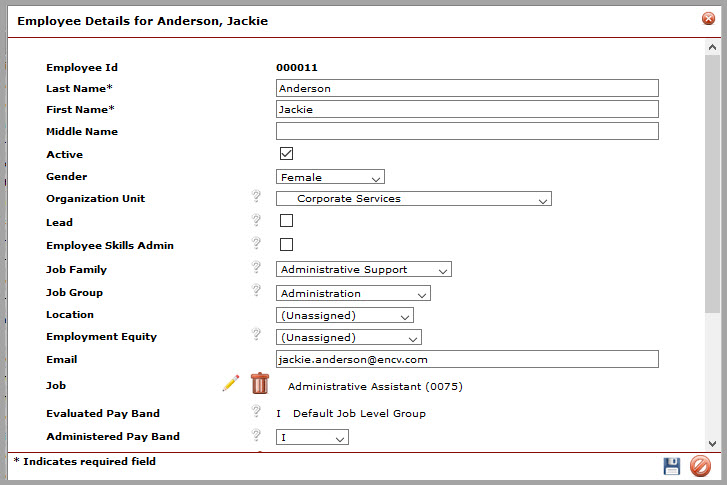
•To edit an Employee, highlight the Employee and double click anywhere in the highlighted area or click • The Employee Details screen will open.
•Note: Employee ID is the Primary Key for the Employee Table and can not be changed. •Make any necessary changes to the Employee Name fields. •The Active status box indicates the status of the Employee: checked • •Check the Active Status box to make an Inactive Employee Active (this will clear the Inactive Date). •Select the desired Organization Unit, Gender, Location, Job Family, Job Group, Employment Equity and Administered Job Level (Optional). •The Lead box identifies whether this employee is the leader of the selected Organization Unit; checked •To change Supervisor, Click •Enter the E-Mail address of the Employee in the text box (e-mail addresses are used for notifications about Reviews. •The Administered Job Level can be changed by selecting a new grade from the pick list. •To change Job, click •To change User Name, click
Click
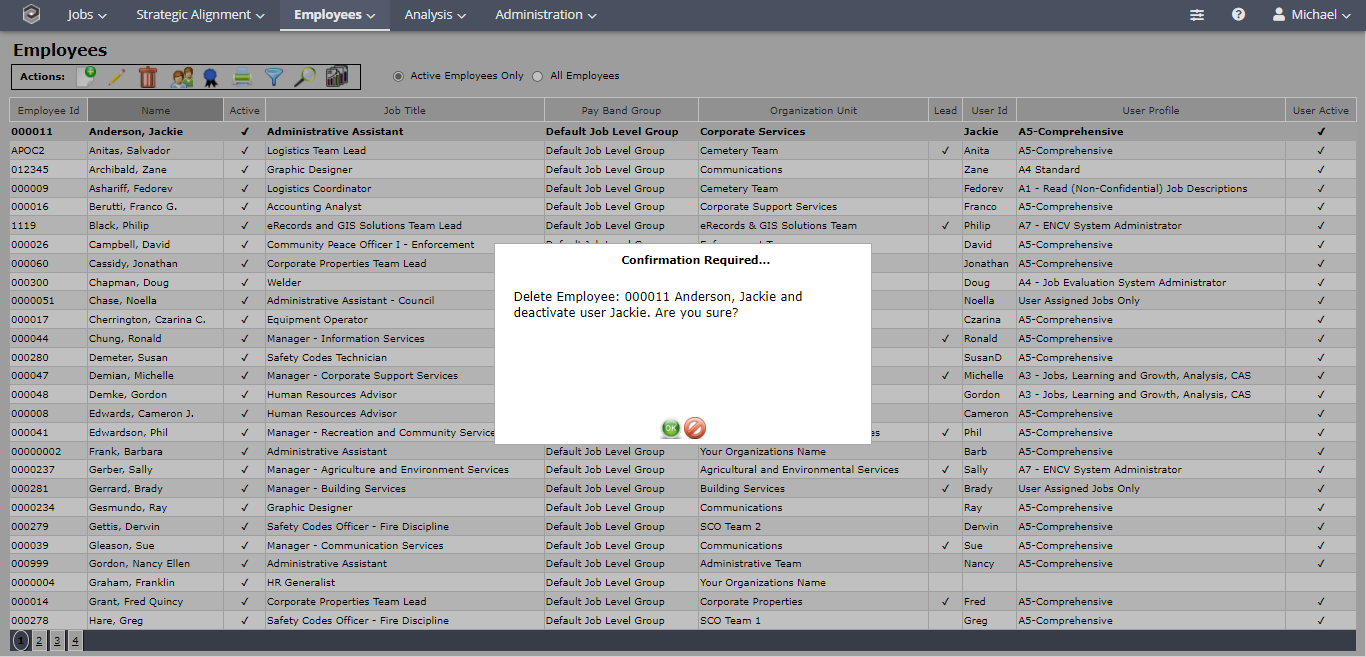
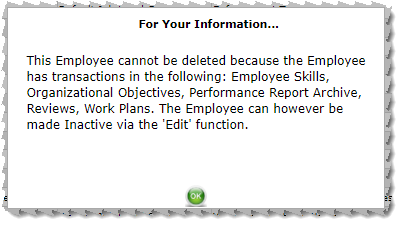
•To delete an Employee, highlight the Employee and double click anywhere in the highlighted area or click •Confirmation will be required. (as shown above). •Click •Proceeding with the deletion, will display the following "for your information" message if records are attached to the Employee.
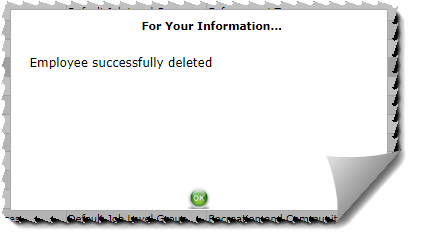
If the Employee entered in the system and has no records attached, the following message will populate.
Important Note: An Employee who has records (job assignment, work plans or reviews) attached to their Employee ID cannot be deleted from the system. It is recommended that instead of Deleting an Employee, they be made Inactive. This keeps all Job and Learning and Growth records for the Employee intact while freeing up additional constraints (licenses) for entering a new Employee name into the system. When an Employee is made Inactive, their details will be hidden from all users except the Administrative User in the Employees screen. They can be made Active again if they need to be but this will count against the license limits. Deleting an employee permanently removes all record of them from the database. This deletion is irreversible. One important consideration is that any reviews performed by this Employee can no longer display his/her name as the reviewer and “unknown reviewer” will be shown in place of the name.
Note: The user must be deactivated so that the employee can no longer access the system.
Employee Reviewers/Reviews See detailed instructions in the Help topic: Reviewers
See detailed instructions in the Help Topic: Maintain Employees Skills for Non-Admins or Employee Skills Admin - Department Admin or HR Admin. To add or change Employee Skills: •Highlight the Employee name. •In the Actions box, select Add/ Edit Employee Skills, •On the screen you will see what skills are currently attached to the Employee. From here you can enter the skill reference number in the Search box if you know it, or click on the •Select the appropriate Skill or Certification and double click on it. Click •The Effective date defaults to today’s date, but can be changed by clicking •If the Skill expires, the Expiry Date is a required field. •Complete the Memo Notes as appropriate. •To edit a Skill, select the skill and double click or click •Make any necessary changes to the effective date or Memo Notes. • •To Delete a skill, highlight the skill and click
Administrator Note: Deleted skills (from the Job) will remain in past completed Learning and Growth Reviews, but they will no longer be included in any information about the Job (Job Descriptions, Postings, Interview Guides), nor will they be included in future Learning and Growth Reviews.
To renew a Skill: •Some Skills and Certifications expire and must be periodically renewed. •Highlight the Employee name. •In the Actions box, Click the Employee Skills icon, •Highlight the Skill to be renewed. •Click Renew •The Renew Skill Details page opens. •The Effective Date, Expiry Date and New Effective Date will be populated based on the previous effective period. •Populate the New Expiry Date field using the calendar function. •Add optional memo notes. •
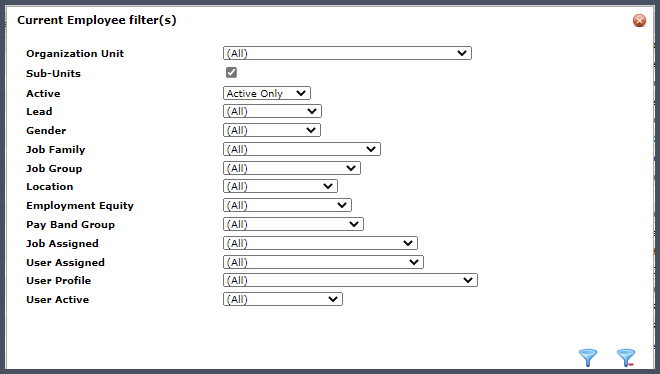
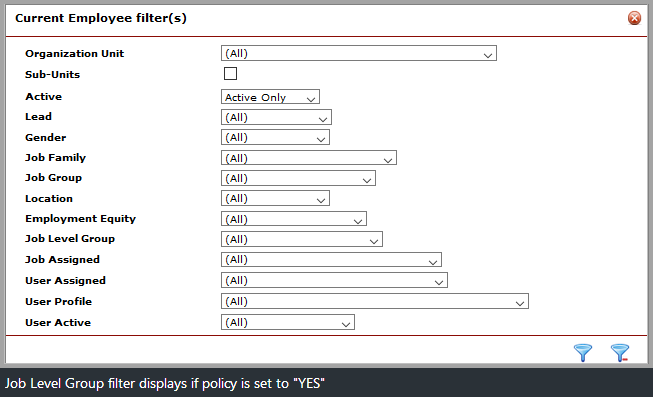
The filter screen opens automatically when this menu item is accessed by an Administrative User. Note: The filter sample below shows the filter selection if the policy: Employees>Employee Settings> Reviews - Do you use Employee/Supervisor relationship for Reviews? is set to NO (default) or Yes.
•Select the appropriate filter criteria then •To change the filter criteria, click •Select
The following filter options are available:
Organization Unit: Select an Organization Unit from the list. The default is All for Admin Users. For all others, it will be the top level the User can access as a Supervisor/Lead. oOnly Employees that have been linked to the selected Organization Unit will be shown on the Employee list. Note: For confidentiality reasons, co-Lead names will not show on the list to other co-Leads. •Include Organization Sub-Units default is enabled ( •Active: Select the Active filter to view Active only, Non-Active Only or All. Defeats to All. •Lead: Select the Lead filter to view Leads only, Non-Leads only or All. Defaults to All. •Job Family: Select a Job Family from the list. oOnly Employees that have been linked to the selected Job Family will be shown on the Employee list. •Job Group: Select a Job Group from the list. oOnly Employees that have been linked to the selected Job Group will be shown on the Employee list. •Location: Select a Location from the list. oOnly Employees that have been linked to the selected Location will be shown on the Employee list. •Employment Equity Code: Select an Employment Equity code from the list. oOnly Employees that have been assigned the selected Employment Equity code will be shown on the Employee list. •Pay Band Group: Select a Pay Band Group from the list. oOnly Employees that have been linked to the selected pay band group will be shown in the Employee List. •Job Assigned: Select Job Assigned filter to view Employees without Jobs Assigned, Employees with Jobs Assigned or All. Defaults to All. •User Assigned: Select User Assigned filter to view Employees without a User Assigned, Employees with a Users Assigned or All. Defaults to All. •User Profile: Select User Profile filter to view Employees with a selected profile. Defaults to All. oThese profiles are defaults in the application. There may be a custom profile that has been set up by the system administrator. •User Active: Select User Active filter to view Active Users Only, Inactive Users Only or All. Defaults to All.
Note: The terms included here are the System default terms. If you have customized the application, your alternate terms for Job Family and Job Group will be populated.
You can filter by one or more fields associated with the Employee. Click 1. Organization Unit 2. Sub-Units 3. Lead (or Non-Lead) 4. Gender 5. Job Family 6. Job Group 7. Location 9. Job Level Group 10. Job Assigned 11. User Assigned 12. User Profile 13. User Active The more filters you use, the more narrow your search will be. If no records are found, try to search again with fewer filters. To clear all filters, click
|